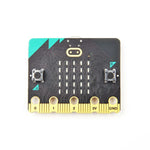
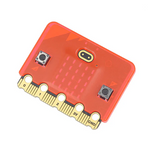
Have you ever dreamed of wielding a wand like Harry Potter, making lights dance with your spells? This project uses two micro:bits and basic electronic components to create an interactive wand-controlled light show. In its basic version, swishing the wand triggers LED animations. For those seeking advanced "levitation magic," you can expand it with motor and fan modules (see the bonus section)!


Step 1: How It Works

Core Mechanics

1. Wand Controller:

• The micro:bit in the wand detects gestures (e.g., shake or circle) via its gyroscope and sends radio signals.

Custom Gesture Training:

• Trained "Yes" gesture recognition (Image 1)

• Test result for "Yes" gesture (Image 2)


• Test result for "No" gesture (Image 3)

Code Logic: Trigger signal transmission when specific gestures are recognized.


ml.onStart(ml.event.Yes, function () {
    basic.showIcon(IconNames.Yes);
    radio.sendValue("value", 1);
})
ml.onStart(ml.event.No, function () {
    basic.showIcon(IconNames.No);
    radio.sendValue("value", 0);
})
basic.forever(function () {
    basic.clearScreen();
    basic.pause(2000);
})

2. Receiver & Light Effects:

• The receiver micro:bit activates LEDs or other devices based on radio signals.

let receivevalue = 0;
radio.onReceivedValue(function (name, value) {
    if (name == "value") {
        receivevalue = value;
    }
})
basic.forever(function () {
    if (receivevalue == 0) {
        basic.showIcon(IconNames.No);
    } else if (receivevalue == 1) {
        basic.showIcon(IconNames.Yes);
    }
})

Key Principles

Wireless Communication: micro:bit’s Radio module enables signaltransmission.

Expandability: Start with LED control and upgrade to motors/servos for advanced interactions.


Step 2: Build It

Materials Needed

Category
Components
Wand micro:bit, battery pack, aluminum can (wand casing), tape
Receiver & Lights micro:bit, 5mm LED (or Neopixel strip), 220Ω resistor, breadboard, jumper wires
Optional Expansion 5V DC motor, MOSFET, 9V battery, cardboard fan blade (for levitation)
 

Step-by-Step Guide

1. Wand Assembly

• Coding (MakeCode):

  radio.setGroup(1);
  input.onGesture(Gesture.Shake, () => {
       radio.sendNumber(1)  // Trigger on shake
  })

Hardware: Embed the micro:bit into the aluminum can and connect the battery pack.

2. Receiver & LED Circuit (Basic Version)

Circuit Setup:

• Connect the LED anode to micro:bit’s P0 pin via a 220Ω resistor; cathode to GND.

Receiver Code:

  radio.onReceivedNumber(function (receivedNumber) {
       pins.digitalWritePin(DigitalPin.P0, 1)  // Light up LED
       basic.pause(1000)
       pins.digitalWritePin(DigitalPin.P0, 0)
  })

3. Test & Enhance

• Basic Demo: Swish the wand to trigger LED flashes.

• Pro Tip: Program rainbow effects with Neopixel strips (additional code required).


Step 3: Expand It

From Light Show to Levitation

1. Levitation Upgrade (Optional):

Hardware Mod: Add a motor, MOSFET, and fan using the expansion pack components.

Code Adjustment: Redirect P0 pin control from LED to motor.

Testing: Place a feather above the fan and activate it with wand gestures.

  # Advanced Code: Motor Control
  if msg == "levitate":
       pin0.write_digital(1)  # Start motor
       sleep(5000)
       pin0.write_digital(0)

2. Creative Mods:

• Use servos to auto-flip a "magic book."

• Add voice modules for spell-casting sound effects.

Why It Matters

Beginner-Friendly: Build the basic version in 30 minutes with minimal components.

Endless Possibilities: Scale up to motorized projects or IoT integrations.

STEAM Integration: Combines physics (circuits), art (light design), and storytelling (magic themes).


Epilogue: Your Magic, Your Rules

Whether lighting up LEDs or levitating feathers, the true power of your micro:bit lies in

creativity. Master the basics, then conjure your own enchantments!