In today's era of rapid technological development, smart agriculture has become the key to improving crop yield and quality. This article will guide you to explore the charm of smart planting technology, and through a specific DIY project, allow you to experience the innovation and practice in this field first-hand.
Project Overview
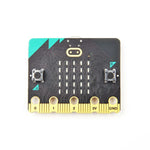
We will use micro:bit as the core controller, combined with IoT:bit expansion board, to create an intelligent plant growth system. The system will place plant seeds in a special greenhouse base, and through a transparent cover, allowing you to visually observe the growth of the plants.
To ensure that plants can grow in the most suitable environment, we integrate light and soil moisture sensors to monitor the growth conditions of plants in real time. The system will automatically adjust the 8 rainbow light rings based on the monitoring data, simulate natural light, and precisely control irrigation through a 3V pump and relay to ensure that plants receive sufficient water.
In addition, through the graphical programming platform, you can easily learn and write programs to intelligently regulate the growth environment of plants. You can also upload data to the IoT platform for in-depth data analysis and share your results with others to further deepen your understanding of smart agricultural technology.
Bill of Materials
- Greenhouse base
- Outdoor enclosure
- IoT:bit Expansion Board
- micro:bit motherboard
- Octopus soil moisture sensor
- Octopus light sensor
- Octopus 8 rainbow light rings
- Octopus 3V pump
- Octopus 3V relay
- Several 3-pin DuPont wires
- Plant seeds, soil and clean water
Preparation work
First, you need to prepare the base and cover of the greenhouse. The base can be made by 3D printing or using other creative methods such as plastic bottles for DIY. The cover is recommended to choose a white transparent plastic bag with corresponding brackets, or use plastic bottles for modification, depending on your available resources.
The download links for the greenhouse base and cover model files are as follows:
https://www.elecfreaks.com/download/xgo/plant_model.stl
Assembly steps
1. Insert the micro:bit into the IoT:bit expansion board and secure the expansion board to the greenhouse base using double-sided non-stick adhesive tape.
2. Connect the 3V water pump and 3V relay to the IoT:bit expansion board according to the wiring diagram, and place them in the appropriate location.
3. Pour soil into the plant growth tank at the base of the greenhouse and sow seeds.
4. Insert the soil moisture sensor into the soil.
5. Install 8 rainbow light rings on the top of the cover and use double-sided tape to attach the light sensor to the cover.
6. Connect the soil moisture sensor cable, 8 light ring cables, light sensor cable, and 3V pump water pipe through the hole position of the transparent greenhouse cover as shown in the diagram, and then place the transparent greenhouse cover down.
7. Connect the 3V pump, 3V relay, soil moisture sensor, light sensor, and 8 rainbow lights as shown in the following diagram:
8. Add an appropriate amount of water to the sink at the base of the greenhouse.
Programming preparation
1. Visit "makecode.microbit.org", create a new project and name it.
2. Click on "Extensions" in the block drawer, search for and load the "iot-environment-kit" and "neopixel" software libraries.
Example code
The program in this case will use light sensors and soil moisture sensors to monitor the plant growth environment, automatically controlling the rainbow light ring and water pump according to data changes, providing ideal lighting and moisture conditions for the plants.
Program Interpretation
Epilogue
Through this DIY smart greenhouse project, you can not only experience the convenience and efficiency of smart agriculture first-hand, but also gain a deeper understanding of the technical principles behind it.
For more interesting cases and resources, please visit https://wiki.elecfreaks.com/microbit-smart-greenhouse-kit.


