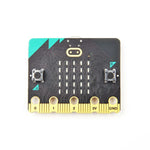
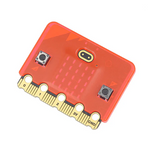
Micro:bit CreateAI is a free, online platform that allows students to dive into AI and machine learning (ML) through movement.
With CreateAI, you can:
-
Collect motion data using the micro:bit's built-in accelerometer.
-
Train a machine learning model to detect patterns in this data.
-
Program the micro:bit to run the trained ML model, enabling your project to work on the go.
Micro:bit CreateAI gives you the opportunity to understand the crucial role data plays in AI, while building AI literacy. It also reinforces key concepts from computer science, as well as data literacy skills that are essential in subjects like mathematics and science.
For educators, we offer helpful resources on our Teaching Tools page, along with an AI glossary to familiarize you with key AI terminology.
1. What is Machine Learning? Understanding the Basics
Machine learning (ML) is a branch of AI that enables computers to learn from data and make decisions without being explicitly programmed. It's behind many everyday technologies, such as fitness trackers that monitor your activity or photo apps that automatically recognize faces.
In education, ML can be easily adapted for smaller datasets, making it a perfect fit for classroom projects with the micro:bit. Students can explore ML by collecting personal movement data from the micro:bit's accelerometer, gaining hands-on experience with how machine learning works.
2. Introduction to Machine Learning
To get started with micro:bit CreateAI, follow these general steps:
a. Connect your micro:bit to the CreateAI platform.
b. Collect movement data using the micro:bit's accelerometer.
c. Train and test your machine learning model with the data.
d. Refine the model by re-training and testing it for better accuracy.
e. Integrate your ML model into a MakeCode program.
f. Download the program and model onto your micro:bit.
g. Optionally, save your project to share with others or revisit later.
3. Requirements
What You'll Need
- A computer (desktop, laptop, or Chromebook) with the Chrome or Edge browser
- A micro:bit V2
- A USB data cable
- Batteries and a battery pack
- A strap or holder to attach the micro:bit to your wrist, ankle, or another object
- If the student's computer doesn't support Bluetooth, an additional micro:bit V2 will be required
- For the best experience, it's recommended that students have some familiarity with the micro:bit and the MakeCode editor.
4. Can I Use a Micro:bit V1?
Yes, you can use any version of the micro:bit to collect data and train or test an ML model. However, to code and run machine learning models in MakeCode, the micro:bit V2's faster processor is necessary.
If you're using a V1, you'll need Bluetooth to connect, as it doesn’t support radio functionality.
5. Connecting Your Micro:bit
To gather the data needed for training your ML model, you'll first need to connect a micro:bit to your computer. This micro:bit is referred to as the data collection micro:bit. Since you’ll be collecting movement data, the connection must be wireless. There are two options for this: Bluetooth or radio link.
Note: Some computers, especially those in school environments, may not have Bluetooth capabilities or it might be permanently disabled.
6. Using Bluetooth with My Computer
If your computer has Bluetooth, you’ll need just one micro:bit and Bluetooth enabled on your device to establish a Bluetooth connection.
7. If My Computer Doesn’t Have Bluetooth
You’ll need two micro:bits to set up a radio link connection: one for the radio link and one for data collection. The radio link micro:bit connects to your computer via USB and receives data wirelessly from the data collection micro:bit.
8. Follow the On-Screen Instructions
Micro:bit CreateAI will help you set up and connect your device correctly.
Note: If students' computers don't have Bluetooth, they may receive different instructions. In this case, you can demonstrate how to connect using the "micro:bit radio" option instead.
Once connected, you'll be ready to start gathering data.
9. Collect Data Samples
The data collection micro:bit uses its built-in accelerometer to detect movement across three axes: x, y, and z.
It then wirelessly sends this data to micro:bit CreateAI.
In the CreateAI tool, you can see this data displayed in a live graph, which updates in real time based on the movement of your micro:bit.
Now, you’re ready to start recording the movement data that will be used to train your machine learning model. To begin collecting data, follow these steps.
Step 1: Prepare Your Data Collection Micro:bit
Hold the data collection micro:bit in place, ready to capture movement data.
Step 2: Select Your Movements
Choose the specific actions or movements you want your ML model to recognize, such as clapping, waving, running, or jumping.
Step 3: Label Your First Action
Actions represent the different movements you want the ML model to learn, like waving or clapping. Give your first action a name and feel free to customize the icon if you wish.
Step 4: Capture Data Samples
Click the 'Record' button, or press button B on the micro:bit, to start recording data samples of your movement. Each sample will last for 1 second.
Tip: Start moving immediately after pressing 'Record' to ensure the data is captured effectively.
Step 5: Capture Additional Data Samples
To train your model, you need a minimum of 3 data samples for each action. However, the more data you collect, the better your ML model will perform.
Step 6: Review Your Data Quality
Evaluate the quality of your data. If you notice any irregularities or outliers, remove them during the data cleaning process. If necessary, record additional samples to ensure your data is accurate and reliable.
Step 7: Add More Actions
Click the ‘Add action’ button to create additional actions and collect data for each one. You’ll need at least two actions to begin training your ML model.
Once you have gathered enough actions and data, you’re ready to start training your model.
10. Train and Test Your ML Model
Once you’ve collected enough actions and data, the ‘Train model’ button will be enabled. Click this button to train your model, and then you can proceed to test its performance.
Test each action by moving your data collection micro:bit. Does the model accurately detect and recognize each action?
11. Confidence
The certainty indicates how confident the ML model is that the movement you're performing matches the action. A higher percentage means the model is more certain.
The predicted action is the movement the model identifies as the one you're currently performing.
The recognition point is the confidence level at which CreateAI determines you are performing a specific action. You can adjust this threshold to see how it affects the model’s ability to recognize your movements.
12. Enhance Your ML Model
If your model isn’t recognizing actions as accurately as you'd like, it's time to improve it.
Here are some steps to help:
- Add an action like ‘still’ or ‘other’ to account for being stationary or movements that shouldn't be recognized as your target actions.
- Collect samples in various orientations or keep the micro:bit in a fixed position. You might also need to record ‘still’ samples in different positions.
- Gather more data, or involve other people to collect samples, as different individuals may perform the same action in different ways.
- If some actions have too similar movement patterns, try using more distinct actions, such as clapping vs. waving or walking vs. jumping.
Improving the model is an iterative process, similar to how larger AI systems are developed. It helps students understand that machine learning models depend on quality training data—data must be collected, labeled, tested, and refined by humans.
Once you’re satisfied with your model’s accuracy, you can use it in MakeCode to create your own projects.
13. Code with Your ML Model
Now that your ML model is successfully recognizing movements, you can integrate it with MakeCode and run it on your micro:bit V2 without needing a computer.
Click the ‘Edit in MakeCode’ button to open the editor. You’ll see ML blocks corresponding to the actions you defined in your model. You can modify these blocks to customize the actions and add your own code to create unique projects.
14. Download Your ML Model and Code
Once you're ready, download both your project and ML model to your micro:bit V2. Simply press 'Download' and follow the on-screen instructions.
Now, you can take your micro:bit CreateAI project and ML model with you and use it without needing a computer.
15. MakeCode ML Blocks
Micro:bit CreateAI projects can utilize a range of ML blocks that integrate with your trained model. These blocks can be found in the ‘Machine Learning’ category at the top of the MakeCode toolbox.
For example, use the on ML ... start block to trigger actions based on your model’s predictions.
This block triggers when the ML model detects that a new action has started.
Although the ML model continuously updates its estimated action multiple times per second, this block only activates when there is a change in the estimated action.
The ‘unknown’ option indicates when the model is uncertain and no action meets the required certainty threshold.
For example, use the on ML … stop block to trigger actions based on your model’s predictions.
This block activates when the ML model determines that the current action has ended.
When the estimated action shifts, the stop block for the previous action will execute, followed by the start block for the new action.
Additionally, you can use the stop block to get the duration of the action, which is the number of milliseconds since it was first recognized. You can incorporate this duration into your code, for example, to display it on the screen or update a variable to track the total time.
16. MakeCode Simulator
You can test your ML code using the simulator in MakeCode. Simply choose the action you want to trigger from the ‘ML event’ menu. Once you're satisfied with how the code works, download the project to your micro:bit and test it in real life.
Note: The MakeCode simulator is not connected to your micro:bit, so it won't respond to physical movements like it does in micro:bit CreateAI.
17. Saving and Loading Your Project
Saving Your Project
While you're working on your project, micro:bit CreateAI automatically stores it in your browser. However, if you want to continue working on it later, you'll need to save it as a HEX file.
Saving your project creates a HEX file that includes:
You can save your project in either CreateAI or MakeCode:
-
In CreateAI, click the 'Save' button in the toolbar.
-
In MakeCode, click the three dots next to the 'Download' button and select the option to ‘Download as File.’
Name your project and save it to your computer or a shared location for later access.
18. Loading Your Project
To open a previously saved HEX file, go to the 'New session' page in micro:bit CreateAI and click the ‘Continue a saved session’ button. This will allow you to browse and select the file saved on your device. Alternatively, you can drag and drop the HEX file directly into micro:bit CreateAI, and your project will open automatically.
19. Expert Features
This experimental feature is aimed at experienced users who wish to analyze their data more closely. When you train your model, your movement data is processed using statistical methods like averages and ranges, which we refer to as 'data features.
The data features view provides a more detailed look at how your data is presented to the ML model. You can hover over the stripes to see which features are being applied.
This view can help you refine your training data by spotting anomalies, or identifying data points from different actions that may appear distinct in the graph view but are actually quite similar when processed by the model.


